
Review using philosophies already described previously.
Enemy vs Mission Concept In List Generation
- novel missions
- failed to appreciate the CONTEXTUAL element in the idea of fighting power
- not just the conceptual- i.e. USARF is good at cheap attrition
- not just the physical element- i.e. this model has this profile and is used in this way (CONTEXT changes it's use and thus its importance).
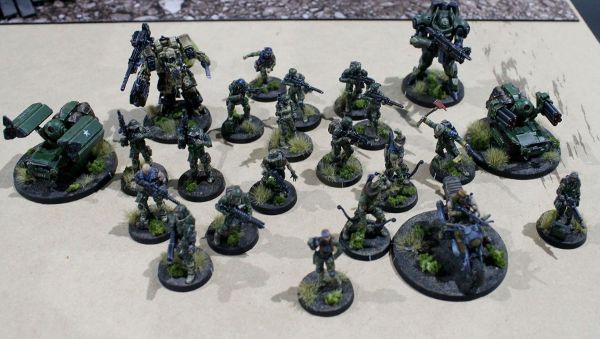
List
-
2x BJ- AP HMG, T2 sniper
-
Marauder Paramedic
-
Katyusha, Dozer
-
2x Hardcase
-
3x Foxtrot
-
Grunt double sniper link
-
Dozer
Capture and Protect- Highly Classified
-
BJ AP HMG
-
Katyusha, Minesweeper, Dozer
-
2x Hardcase
-
3x Foxtrot
-
Grunt double sniper link
-
VZ, Desperado
GAMES
GAME
1- Caledonian Highlander Army- Capture and Protect
EN Analysis
-
COG
o Grey AP HMG with Isabel McGregor T2 rifle
§ Wallace
-
CC
o B5 AP HMG BS 16 +3 for range
o Wallace- high speed 10” move (shock action, maneuver concept)
o FO- artillery strike
o Cam infiltrators
o Good maneuver with cheap smoke allow freedom of movement and
effectively have board control
o Cateran- T2 sniper (one hit kills)- with mobility (climbing plus)-
good in reactive (-6 maybe -9 for range)- even better in active
-
CV
o 1 wound- implication for attrition in turns 2 and 3.
§ NWI- T2/ shock
§ Dogged- T2/ shock
o ACTIVE: One figure with high
burst (link team)
o REACTIVE: Cateran limited camo.
Mission analysis
-
Specified task- control console
on FLET
o Implied tasks
§ Deny EN AROs on advance- must kill Caterans
§ Deny easy EN recapture of EN console once held- FAILED TO NOTE
IMPLIED TASK- must kill Galwegians.
§ Break link team to deny 2ARO burst in reactive, deny +3 BS in active
§ Be in a position to easily protect own console (deployment implications).
Summary of Events
-
CHA wins Lt- chose deployment
side, I watch CHA deploy and then deploys (best ability to cover central
consoles AND to negate possible Cateran perches AND likeliest avenues of EN
approach).
-
USARF goes first
o Hardcase/ Foxtrot tasks- provoke Cateran exposure at 16”. With “Discover-shoot”. Once exposed- Grunt snipers destroyed them.
o Attempt to inhibit enemy mobility- Foxtrots and Hardcases (if able)-
went on suppression.
-
CHA Turn 1
o Galwegian maneuver- impetuous units smoking other impetuous units-
completely negated effects of Grunt sniper ARO and midfield suppression. Chain rifle use allowed piece trading very
effectively and opened up midfield for low cost.
o Grey- detection to contact- Linear attack. Killed one sniper. Second sniper killed the Grey. Link team retreated to DZ.
-
USARF Turn 2
o Goal to dominate midfield and allow TURN 3 rush on console.
o Blackjacks advanced- stymied by SAS- unable to win F2F rolls- but
pushed them out of LOF
o Blackjacks went on suppressive to discourage EN maneuver (Wallace
charge for console).
-
CHA Turn 2
o Galwegian smoke again negates suppression and allows CHA freedom of
movement.
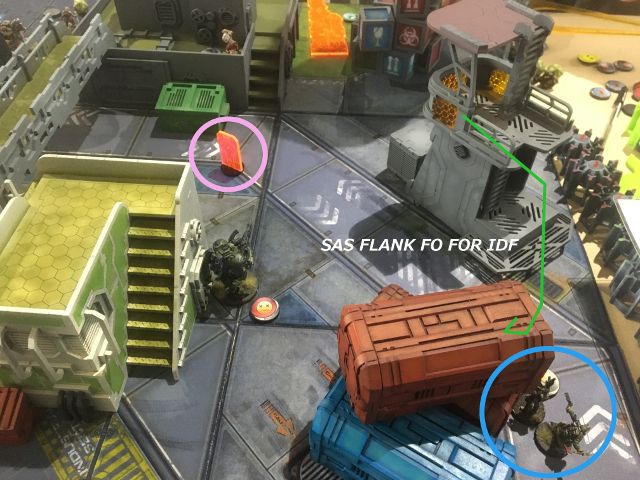
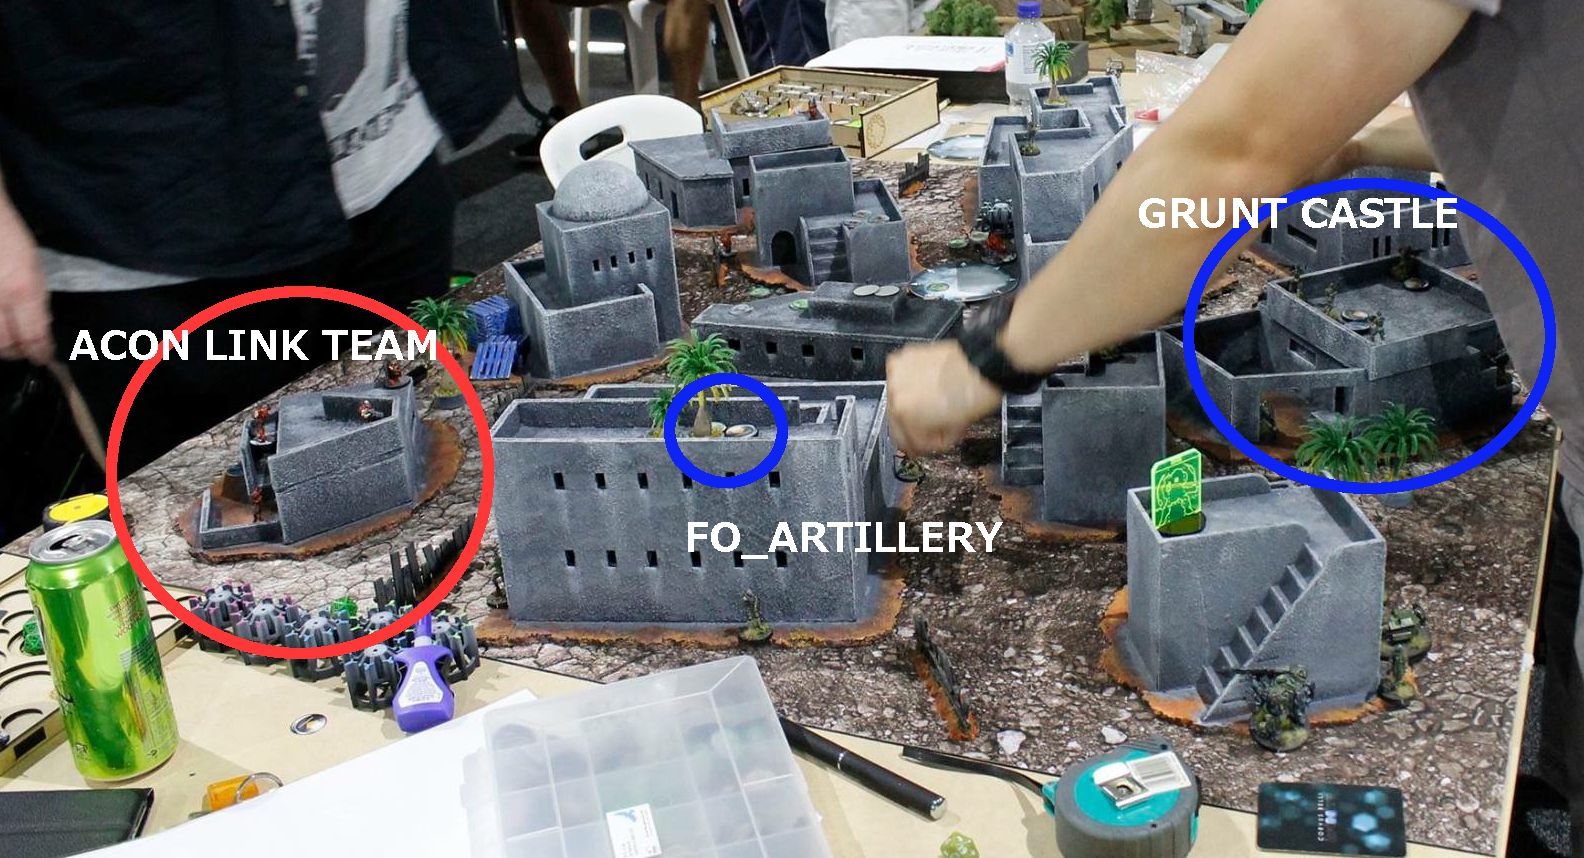
o Maneuver: SAS FO outflanks one Blackjack- FO/ Artillery strike-
destroying one half of table suppression.
*THAT* is maneuver warfare.
o Maneuver: Uxia- sabotage classified! And then advances on friendly
console. Engaged by forward deployed
Marauder paramedic. Stalemate.
-
USARF Turn 3
o Having lost midfield suppression and wary of unhindered CHA maneuver
(mostly by smoke)- the remaining Blackjack was left in place on suppression.
o A forward deployed Marauder attempted to advance on EN console-
fought Uxia in a close fought series of fights.
Eventually won but was unable to reach EN console
o 112 engaged an FO SAS that had reached deep inside FR half of table-
winning- and then reviving a Foxtrot for a Classified.
 |
| Smoke allowing cheap negation of suppression |
- CHA Turn 3
- o Smoke/ Maneuver again- negating suppression from remaining Blackjack (but maybe useful in forcing multiple dice rolls- to increase chance of critical failure???)
o Wallace smokes and moves forward - surviving several Sniper AROs and
rifle AROs from Marauder.
o The ARO process has eroded the order pool and despite numerous smoke
throws that were successful- enough are unsuccessful that Wallace engages the
Grunt sniper in the open in order to reach the friendly console.
o Sniper- shock ammo- neutralizes Wallace before he can reach the
console
-
outcome: Draw
CONCEPTUAL FAILURES
-
No emphasis on utilizing
“Shock-Action”
o No VZ/ AD to shape game and allow- SURPRISE at an important location
and use selective attrition to negate EN critical capability (Galwegian smoke)
-
Failure to note the CONTEXTUAL
element in USARF re: Foxtrots… Mission
(probably the only ones who can do it) and EN (Galwegian chain rifles).
o Resulted in inappropriate use of midfield infiltrators (suppression)
in a way that allowed them to be neutralized without achieving their goal of
restricting EN movement.
o Not having a full appreciation of how the staggered use of Impetuous
orders to smoke can completely achieve “maneuver” on non MSV2 pieces (contextual:
EN).
o Piece trading – Galwegian (even if smoke doesn’t go off- most likely
will)- will run forward and chain rifle forcing a dodge on a suppressive
Foxtrot and still achieve its task of allowing CHA maneuver (contextual: EN).
o Poor understanding of USARF’s own critical capability- midfield
units often only ones capable of achieving any objective.
-
CONTEXTUAL- mission
o Reserved Maverick/ Desperado- higher probability of success in
capturing enemy console rather than Foxtrot (or slow HI/ MI- even if forward
deployed)
-
Pure attritional thinking
o Good- double sniper- SHOCK ammunition to negate dogged and NWI.
o Double Blackjacks on suppressive in concept is fine but orders
should have been better utilized keeping them in suppressive closer to the FR
console (achieve TASK assigned to them without wasting orders) (attritional
thinking done badly).
o No use of SELECTIVE attrition of Galwegians to negate EN freedom of
movement (rooted in not recognizing it as a critical capability)
-
Poor use of maneuver
o Reserve orders for actual maneuver- getting Foxtrot into place on EN
console and then forcing CHA defense (regain “initiative” psychologically
thinking).
o What maneuver? Strong point
defense and maybe a late game sally forth (impossible really).
o Excellent EN maneuver- FO/Artillery on Blackjack
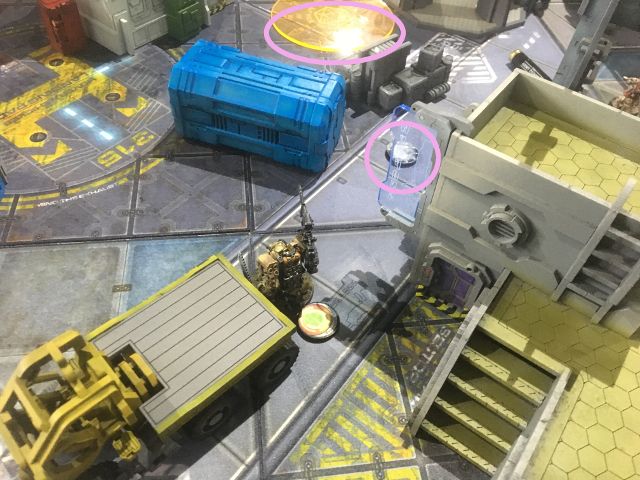
 |
| Smoke (purple) from out of view blocks Foxtrot and 112 ARO. Also recorded- FO/ artillery strike on Blackjack (knocked out). |
 |
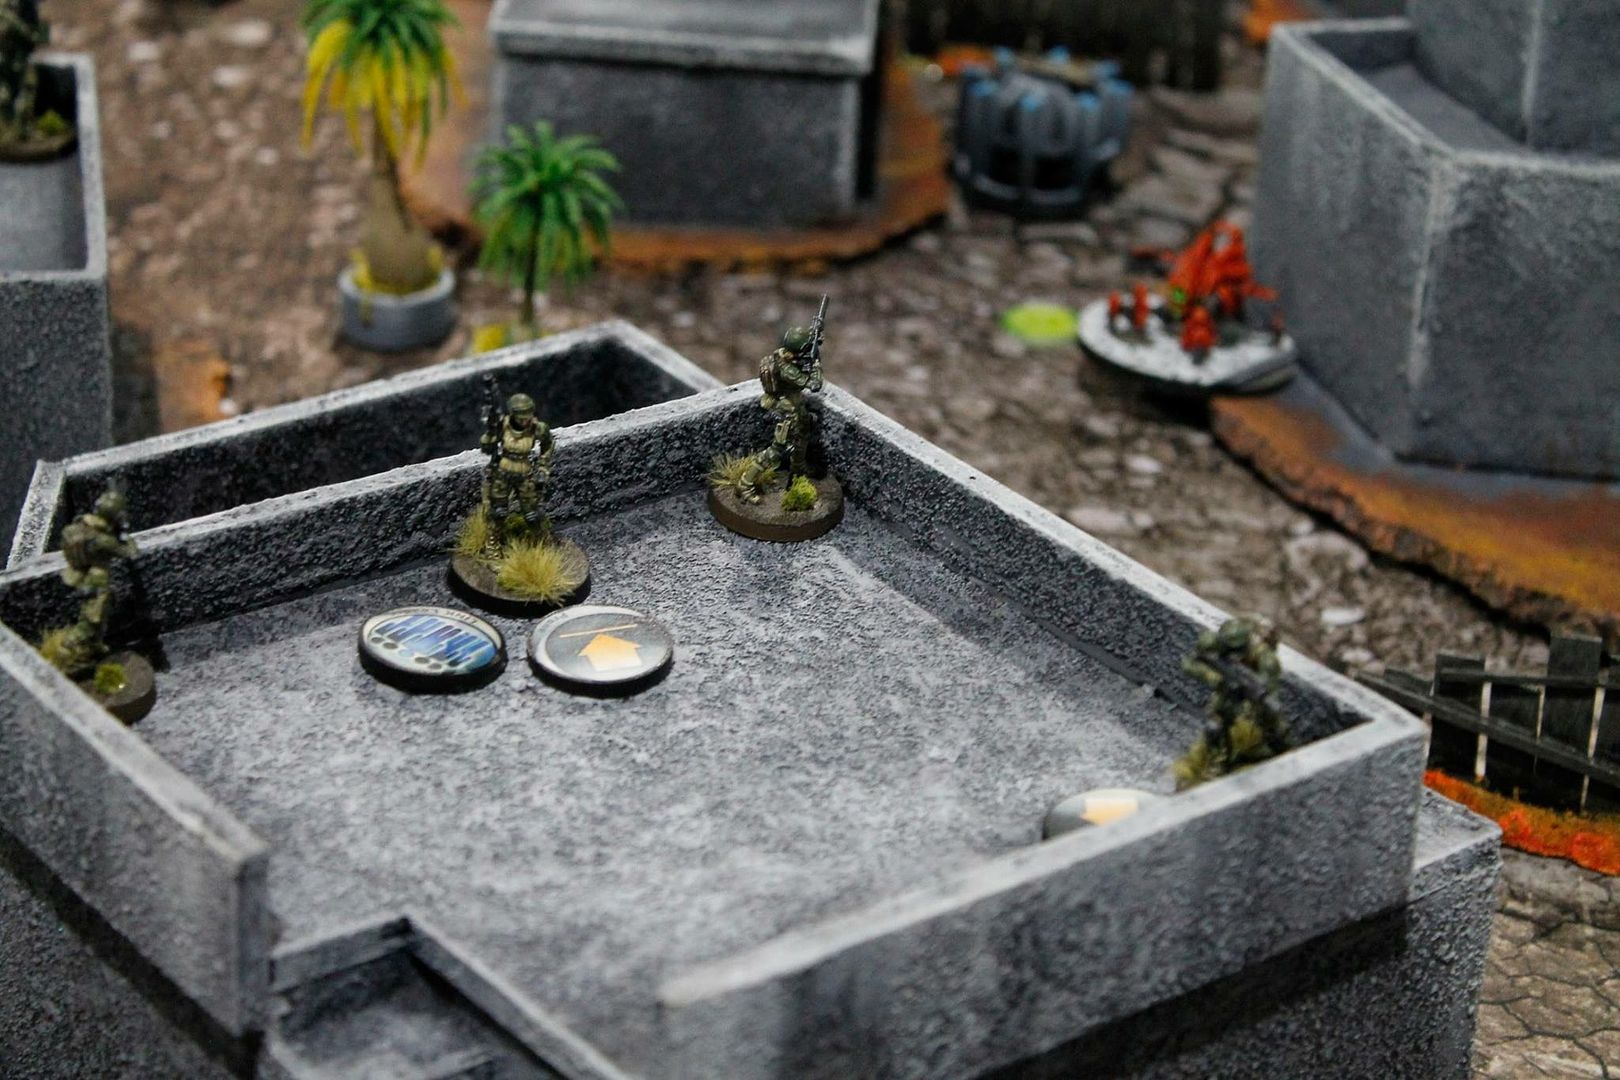
| Deployment zones NB. table photo is pre-Grid objectives. |
EN Analysis
-
COG
o Metro Link
§ Bruant
-
CC
o B5 Molotok X-visor
o Control- Chasseur will destroy Foxtrots in battle for control of
freedom of movement
o Control- sapper sniper (-6 to hit) with mech deploy
o SHOCK-ACTION- Margot/ Duroc
o Specialists FO adjacent to antennae (rather like Foxtrot FOs but
only better)
-
CV
o No anti-material except on Dozer/ Katyusha
o 1 wound- implication for attrition in turns 2 and 3.
o ACTIVE: One figure with high
burst (link team breaking)
o REACTIVE: 1W 1B reactive- low-ish BS (saturation zone)
Mission analysis
-
Specified task- destroy 5/9
ANTENNA (ARM4 Anti-material only)
o Implied tasks
§ Allow freedom of movement of FOs- kill Zouave
§ Preserve antimaterial- Hardcase/ Blackjack T2 sniper
·
Break link team
·
Kill Jacques Bruant (AP
molotok)
-
Specified task- destroy EN HVT
with data-tracker
o Implied tasks
§ Allow freedom of movement of Blackjack HMG
§ Protect from high burst AP
·
Kill JB
Summary of Events
-
Won initiative and elected to
go first.
-
Engaged Zouave sniper with
Foxtrot FO/ artillery strike at close range- neutralized
-
Stepped up linked snipers onto
mesa and successfully killed one Metro
-
Freedom of movement:
o Advanced Blackjack AP HMG –
§ utilized superior burst to kill Jacques Bruant (exposed)
§ Closed with EN HVT
§ Killed Dozer (exposed)
-
Linked Grunt FO able to split
burst FO multiple antennae
-
Otherwise preserved hard cases -
wary of Chasseurs
MRRF Turn 1
-
Duroc
o Advanced on Grunt link team and Blackjack T2 (both on one mesa)
o Smoke cover- allowed to close and spec fire grenades
§ Grunts lucky to either dodge or pass armour
o Order intensive/ frustrated
o Advanced in open- wounded by shotgun “guard” Grunt. Luckily survived several AROs from Grunt and
112 “guards”- double chain rifled Grunt sniper link
o Blackjack took one wound. One
Grunt sniper neutralized. Pistol fire-
finished off Duroc.
-
Margot- attack from other side-
Vs. Warcor and Traktor mule. Destroyed
Mule. Blinded (eventually).
USARF Turn 2
-
Blackjack T2
o Used entire order pool to destroy 2 and wound 2 antennae.
-
Hardcases
o Used their groups entire order pool to destroy weakened
antennae. Then finished an antennae on
their own.
-
Blackjack HMG
o Killed EN HVT.
MRRF Turn 2
-
Margot killed FR HVT
Result: Win
CONCEPTUAL Discussion
-
appropriate use of selective
attrition to achieve overall strategy and degraded EN strategy simultaneously
-
Shock-Action
o Use of FO/ artillery to engage on favourable terms against sniper
expecting “threat-to-detection” linear engagement
o “SURPRISE”- inexperienced player having not expected this mode of
attack.
o “Maneuver”- cam infiltration
o Selective attrition- two artillery strikes- one to KO, one to kill
and prevent resurrection.
-
But generally shock-action
better demonstrated by Margot and Duroc.
GAME 3- Morat Aggression Force- Power Pack
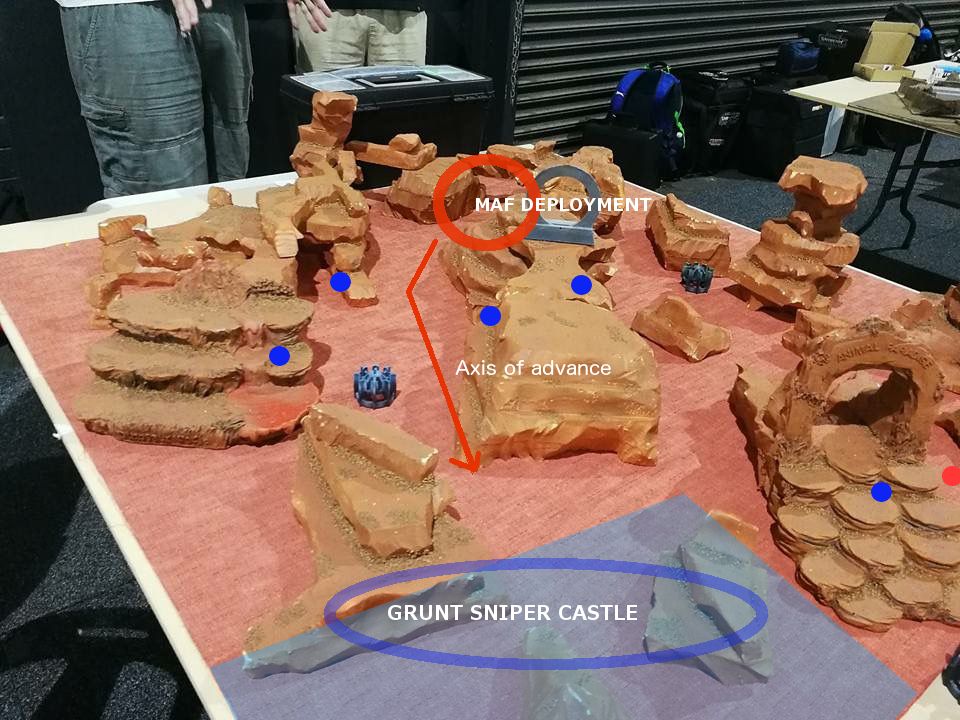 |
| Blue points: Hardcase/ Foxtrot soft defence. Red point: TR plasma remote. |
EN Analysis
-
COG
o Yaogat Link
-
CC
o B5 Spitfire + MSV2- negate cam- linked SSL2 negates surprise
o SMOKE-SHOOT with Daturazi
o Plasma TR bot- template/ BTS damage
o Bit and Kiss- disruption (Pitcher-Exile/ Impersonation)
o Lt. hunting irrelevant
-
CV
o High cost- very vulnerable to attrition
o Usually cannot control table and as such typically do not restrict
maneuver
o Unable to retreat (provided non Morat units are killed first)
Mission Analysis
-
Specified task: control EN
console
o Implied task degrade EN ARO potential to allow maneuver
o Implied task board control
-
Specified task: activate 3 on
centre line antennae
o Implied task- be in position to defend 2 of the 3 (was not able to
get all).
o Implied task- be in position to activate (Foxtrots)
Summary
-
USARF won and chose deployment
-
MAF elected to go first
-
Deployed essentially in
opposite quadrants
o Except for Plasma remote only 16” away from USA “castle”
o Covered by Blackjack
MAF 1
-
Daturazi advance
-
Hardcase shotgun reveals-
killing one Daturazi and splashing supporting Yaogats
-
Daturazi smoke cover- allows
CC- Hardcase wins!
-
Yaogat shoot through smoke and
eliminate Hardcase
-
Yaogat link team trades fire
with one Grunt sniper
o KO one- allows movement along the line toward central antennae
-
Moves into range of Foxtrot
guarding centre antennae
o Foxtrot lays mine and survives round of fire.
o Stymies advance
-
Bit and Kiss
o Impersonate and flank mine
o Discover and shoot it.
-
Dr. Worm moves incautiously at
long range in the open trying to reach MAF console- ignoring camo markers
placed for board control. Specialist
doctor (only one in MAF). Hardcase
rifle on centre mesa engages and neutralizes over 2 rounds of fire.
USARF Turn 1
-
attempt to engage TR remote
with Blackjack- crit wound
o abandoned
-
TR remote engaged with surprise
shot Foxtrot- success
-
Attempt doctor on Grunt sniper-
fail
-
Second Grunt sniper fires on
Yaogat to trigger mine blast- no casualties.
-
VZ- emerges behind MAF line- kills
one Yaogat.
-
Eventually killed by return
fire (should have killed a second but unlucky)
-
Desperado outflanks Yagoat team
and selectively engages Zerat hacker
-
Once neutralized- engages
Yaogat shotgun and is killed.
MAF Turn 2
-
Yaogat Link advances
-
Maneuver inhibited by second
Grunt sniper (linked) and a single Foxtrot threatening another mine drop.
-
Stalemate between two
-
Bit and Kiss attempt to engage
-
Remote killed by sniper looking
down that fire lane
USARF Turn 2
-
Blackjack engages and kills
Yaogats out of position from mine dodging
-
Foxtrot FO surprise shoot and
kills Kiss (protecting FR console)
-
Foxtrot tags centre antenna
MAF Turn 3
-
Single figure- Yaogat- tries to
cut off access to MAF console by establishing ARO corridor
USARF Turn 3
-
Last Yaogat engaged by Hardcase
(irregular order)- tactical bow- killed
-
Remaining orders go into
data-tracker (who reaches enemy console for control)
-
Foxtrot FO- FOs unconscious Bit
for classified
CONCEPTUAL DISCUSSION
-
Classic WEST vs EAST philosophy
in contact.
-
AVOID Combat- camouflage in
midfield only revealing when worthwhile!
o Hardcase that killed two Daturazi- excellent example of the ARO
concept. Cheap and expendable and able
to do harm to the EN ORDER RESOURCE.
Killing Daturazi was a bonus!
o Foxtrots dropping mines when link team close by instead of shooting.
o Frustrated the EN strategy
o Still fulfilled my own strategy- board control
-
Emphasis on Maneuver:
o Grunt link snipers- although not killing Yaogats- were able restrict
freedom of movement allowing my Foxtrot to drop a mine on the resulting conga
line of Yaogats
-
Subdue without fighting
o Mines by central Foxtrot- able to discourage aggressive advance on
my deployment zone AND on centre antennae
-
Combination of ZHENG (normal
direct force) and QI (extraordinary, indirect force) to achieve strategy
o ZHENG- Blackjack, Grunt sniper link- engage and confront
o QI- Foxtrot surprise shots on TR remotes/ Kiss. VZ.
-
SHOCK ACTION
o VZ
o Desperado
o Despite killing very little- they destroyed specialists and broke 5
man link making it more manageable for later.
GAME 4- Shock Army of Acontecimento- ACQUISITION
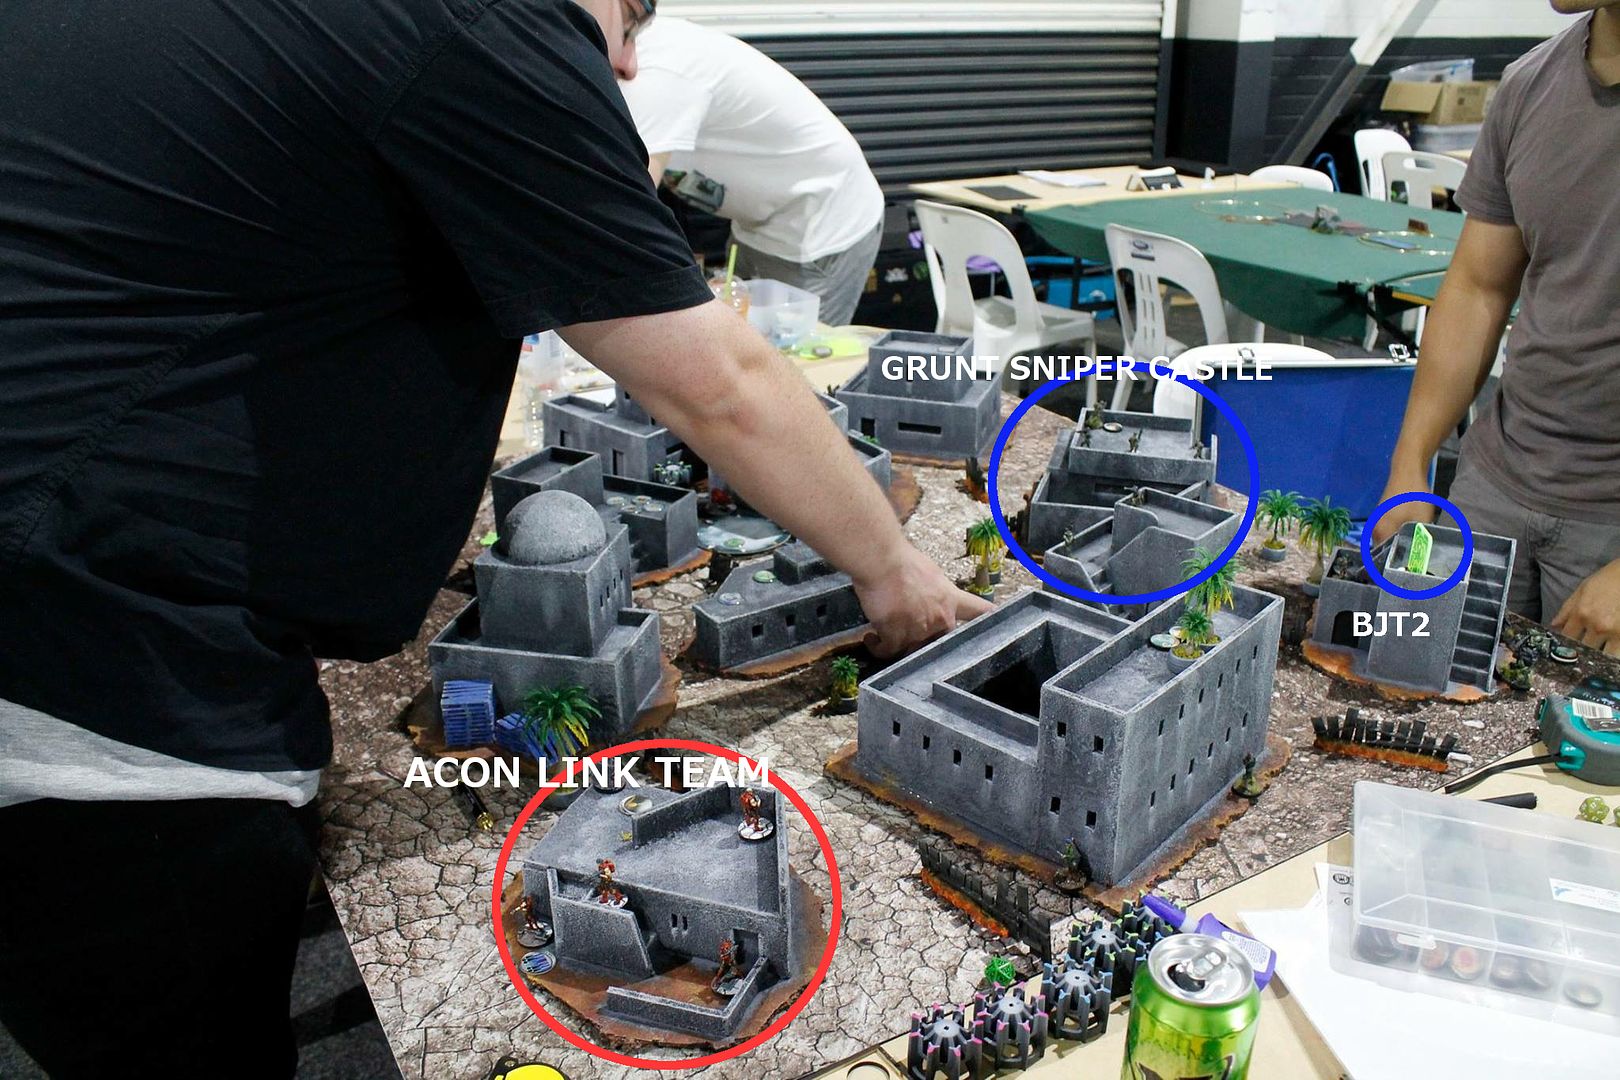 |
| Key deployment. |
EN ANALYSIS
-
COG:
o Guarda-del-Assaulto (GDA)
o I incorrectly pin pointed the Acon Regular link as the COG
-
CC:
o ODD/ suppression fire- Bulleteer
o Cam- Nagas
o Eclipse smoke of GDA
o GDA- multiwound high armour
o Board control- sapper sniper linked
o Sensor bot- negating the camouflage
-
CV:
o High cost
o Fragile link team
MISSION ANALYSIS
-
activate and control two
flanking antenna
-
control central console with
data tracker- worth 5 points!!! (failed to emphasize this as the centre point
of my strategy)
SUMMARY OF EVENTS
-
won Lt. roll off- chose
deployment side
-
castled up
-
T2 Blackjack deployed without
first placing silhouette and checking lanes of fire – BAD!!!!
Turn 1 SAA
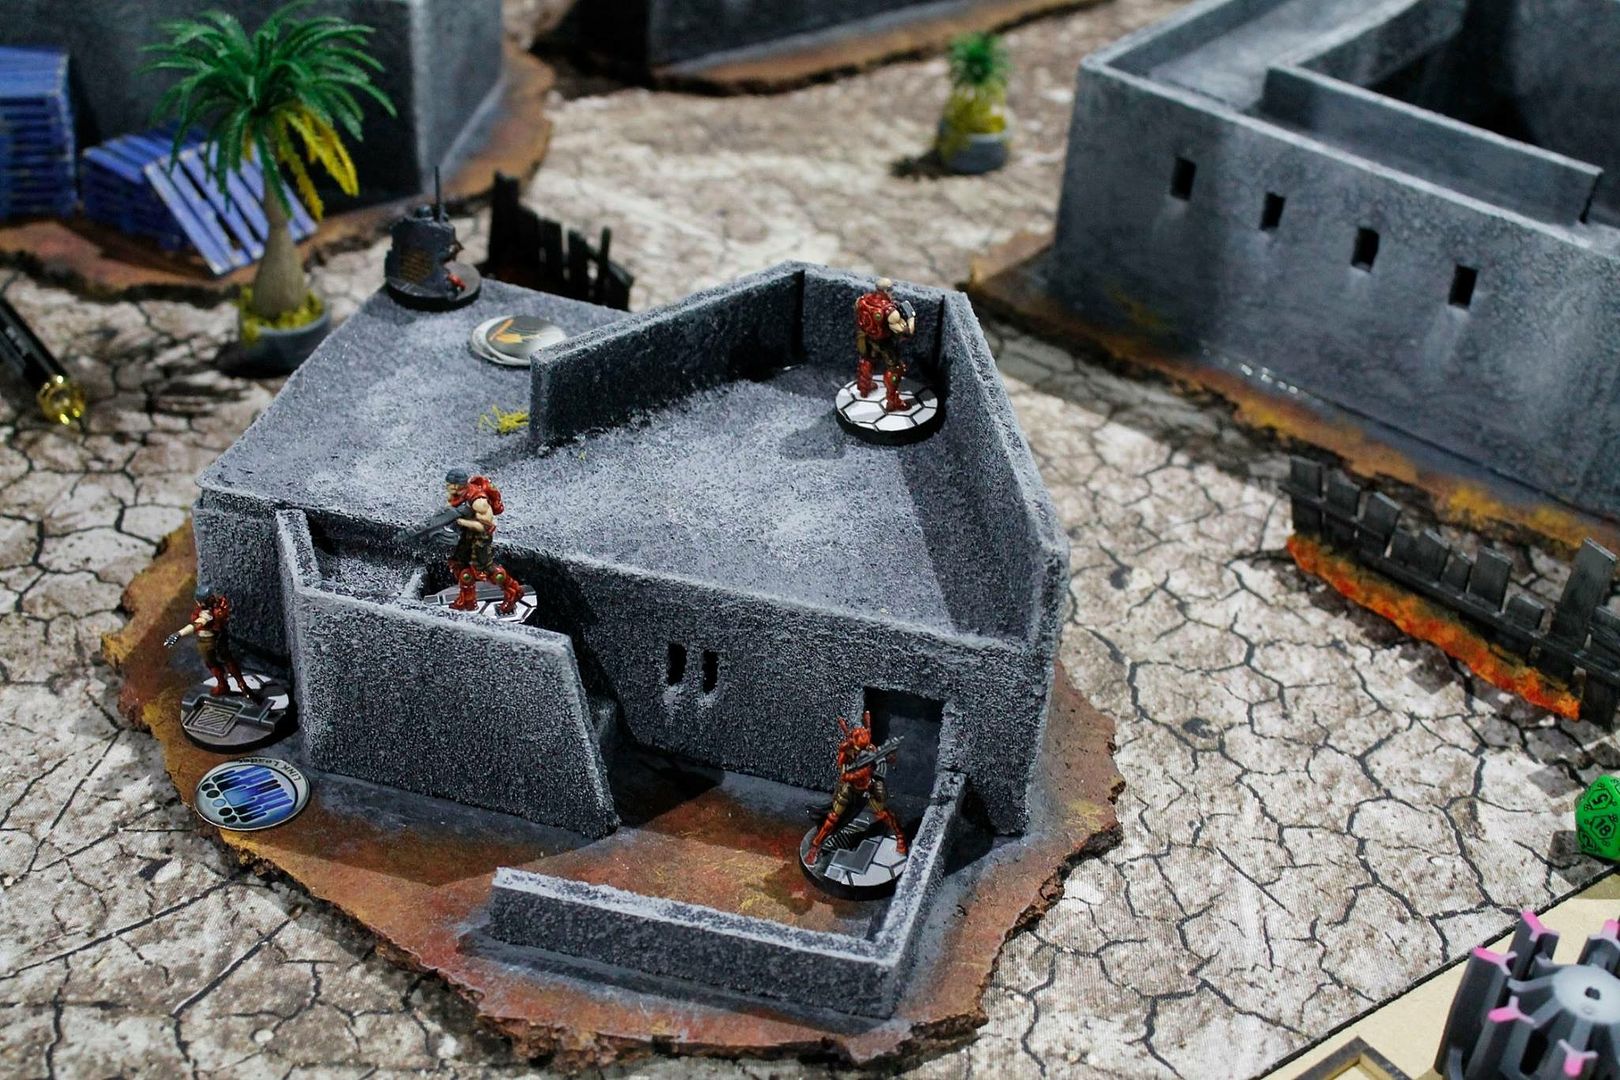 |
| Acon link team- note sapper sniper in key position on building edge. |
-
Eclipse smoke everywhere
o Sensor bot reveals hardcase and Foxtrot
o Bulleteer moves up under cover and attacks castle
o Naga specialist lays mines around one antenna and covers nearby
Foxtrot
-
Multiple AROs on bulleteer-
knocks out Grunt sniper
o Bulleteer knocked out
-
GDA moves to better position
and selectively knocks out pieces at will
Turn 1 USA
 |
| Add caption |
-
Foxtrot FO
o Surprise targets one member of Acon link team
§ KOd in the process
§ Artillery guided strike (WRONG TACTIC) takes out member
-
Hardcase shotgun
o Advances on antenna opposite Naga and controls
-
Blackjack AP HMG
o Attempts to discover shoot the Naga off the far side antenna- fails
WIP
-
Blackjack T2 sniper
o Defeats sapper sniper (v. lucky!)
o But poor position cannot move or target anything else
 |
| Bulleteer contesting 4 AROs (Foxtrot, Warcor, Sniper x2). BJT2 (silhouette) poor position and unable to support. |
Turn 2 SAA
-
Akalis
o Successful drop
o Kills 112
o Breaks Grunt link castle
o Knocks out artillery park
-
GDA
o Selective kills- protecting Naga
Turn 2 USA
-
limited orders (unconscious
models still take up a spot)
-
Blackjack AP HMG
o attempt to engage Naga- failed with some lucky armour rolls
-
Grunt link
o Kills Akalis
o Attempts to advance on the central console
§ Difficult deployment on castle prevents effective advance
§ Single Grunt makes it
-
Blackjack T2 sniper- poorly
deployed has no orders to move into better position nor engage enemies
Turn 3 SAA
-
GDA and another Naga control
central console
o Kill Grunt
o Smoke prevents effective ARO
Turn 3 USA
-
Blackjack charges centre
console
o Flamer- dies.
Result: major loss
DISCUSSION
-
Failures in concept: - Failure in Mission analysis:
most points are in the central console.
o
Spent most orders getting to side consoles and the
blowing the EN Naga off the other opposite console (and failing)
o
Placed my ARO Blackjack in a poor position unable to
cover the centre console…. And in fact could only target the sniper- wasted
points and potential.
-
Failure in Enemy analysis: critical piece is the enemy
data tracker. Was also COG!!! Did not prioritize it’s destruction.
(Guarda-de-Assaulto)
o
Afterwards the player said he was scared of the Blackjack
AP HMG going HAM after the GDA… in hindsight it was the centrepiece of the SAA
strategy.
-
Failure in execution (wasting orders on doing little
things)- and not destroying critical PanO piece data tracker Guarda de
Assaulto. ... among many others.
-
SAA- SHOCK ACTION
o
Failed to guard against it.
o
Most Grunts were prone on the roof of the castle-
which was pointless once the Acon Sniper was dead.
o
If they were standing- the Akalis would have had a
much harder time.
 |
| Castle- rearmost Grunt should have stood up to defend against the (yet to be deployed) Akalis |
-
USA- SHOCK ACTION
o
NO utilization of true shock action to tilt battle in
my favour
§ No Desperado or VZ to
employ maneuver to open new avenue of attack
GAME
5- HAQ- HIGHLY CLASSIFIED
-
the first time you play against something- you’re going to lose.
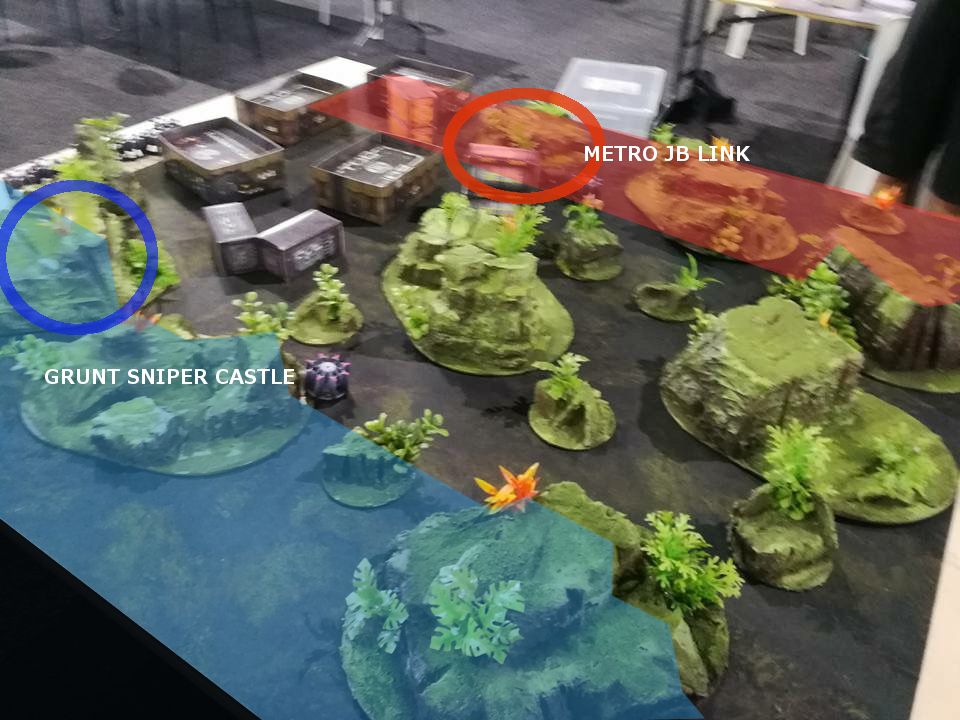
 |
| EN HVT behind container pile. FR HVT behind HVT behind red building closest to USA. Grunt link deployed close to FR HVT. |
EN
-
COG:
o Tariq
o ?Specialists??- probably more this than Tariq.
-
CC:
o Saladin – StratL3
o IMP- Didn’t even occur to me.
o Tariq- unmatchable maneuver/ firepower
o Mutts- inhibit FR maneuver
-
CV:
o Saladin
o Single key attack piece
o 1W weak specialists
MISSION ANALYSIS
-
all Classifieds centred around
HVTs
-
Was forced to go second, and
thus watched EN deployment and then thus positioned my own HVT close to EN HVT
o Was best position to cover from my castle
o Allowed concentration of force
-
Unable to achieve one
Classified. Engineering- difficult
again.
-
USA- “pushing shit uphill”
Summary of Events
Turn 1 HAQ
-
Mutts- effective laying down of
smoke
o None killed in ARO despite reveal of Foxtrot/ Hardcase
-
AL JABEL Impersonator
o CC attack killed Grunt link leader
o Shotgun killed engineer and Lt.
o Smoke and moved into B2B with Blackjack
-
Tariq- selective killing of the
exposed figures (Foxtrot)
Turn 1 USA
-
Loss of Lieutenant
-
Pistol shot AL JABEL off
Blackjack but wounded Blackjack too
-
Desperado killed by single
sniper
Turn 2 HAQ
-
Tariq advances on Grunt castle and
engages wounded Blackjack
o Effective “soft defense” Hardcase rifle reveal requiring Tariq to
split burst
o Unluckily loses several face to face and put unconscious
o Revived and goes on suppression
Turn 2 USA
-
Grunt sniper (linked)
o Kills Ghulam sniper in tower
o Kills Tariq
o Kills Mutts
-
Foxtrot FO
o Able to take advantage of angle from mesa onto Saladin
o Surprise FO/Artillery strike kills Saladin
-
CHOICE- between pushing a specialist forward and scanning HVT or
eliminating EN specialist closest to friendly HVT- critical error here?
-
choice was made to attack with
VZ
o wasted multiple orders trying to kill an ODD doctor (who survived
multiple hits)- unlucky or just poor choices?
-
Unable to advance specialist
Turn 3 HAQ
-
advanced models (including TR
remote) into ARO positions protecting own HVT
-
mined approaches to HVT
-
Grunt snipers unable to kill
key pieces moving in place
Turn 3 USA
-
Snipers attempt to open up ARO
lane- fail multiple times
-
Sacrificial Grunt advanced-
activating mines
o Engaged previously camouflaged skirmisher (natural -3 to hit) armed
with a shotgun
o Killed
-
Specialist advances with own
shotgun
o Unable to approach within 8” HVT due to duel with Haqq skirmisher
Outcome: Draw
DISCUSSION- CRITICAL FAILURES
-
SHOCK ACTION
o Failed to guard against impersonator
§ See tactical notes
o VZ- good deploy
§ Tried to kill instead of neutralize- I.e. block access physically or
via ARO.
§ Could have set up for an ARO instead of chasing the damn doctor all
over the place
-
Did NOT advance own strategy
whilst attacking EN strategy
o Key to win was hacker with a WIP 13 hack
o Very possible in USA Turn 2
o Became hyper aggressive with VZ and failed to note that I could
subdue Haqq doctor (two orders only due to LOL) by literally blocking physical
access to my HVT (positioned deliberately to only allow a narrow avenue of
approach) OR by trying to kill once and then settling in for an ARO position and
going dogged requiring 2 orders to shift (very important when EN is in LOL)
-
PLAY TO WIN not PLAY TO DRAW.
-
I was simply outplayed by a
better opponent
No comments:
Post a Comment