
 |
| Pew pew pew |
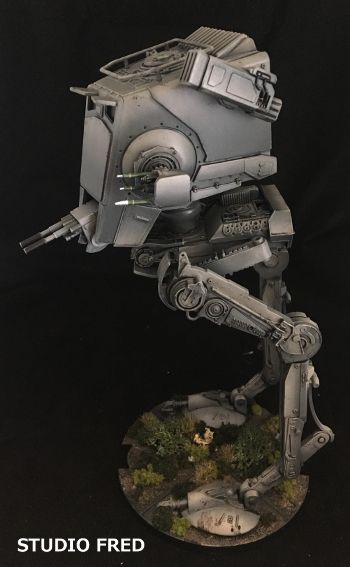
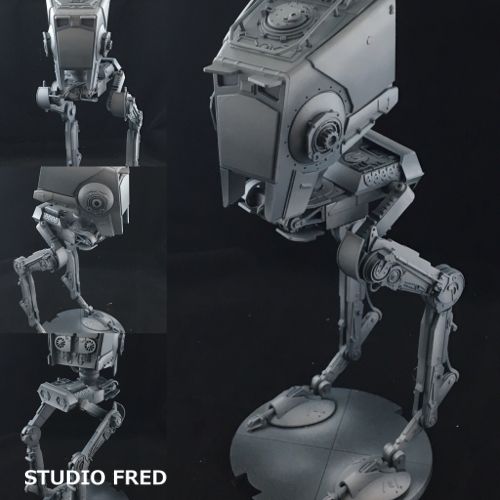
I tried out a lot of new techniques and did my best to dress it up as best as I could. I love the end result.
 |
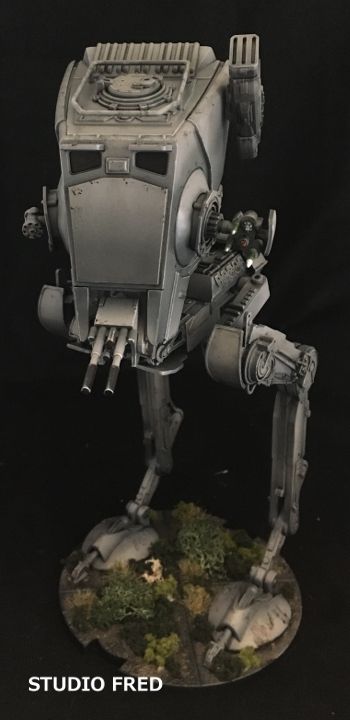
| Weathering really gives the model some life. |
The major things I got to try out were modulation, oil washes and simple weathering with oils and weathering with acrylics.
 |
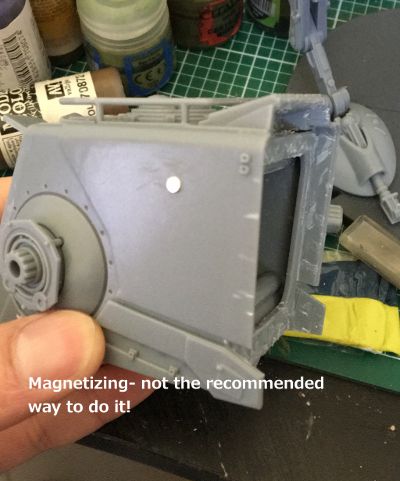
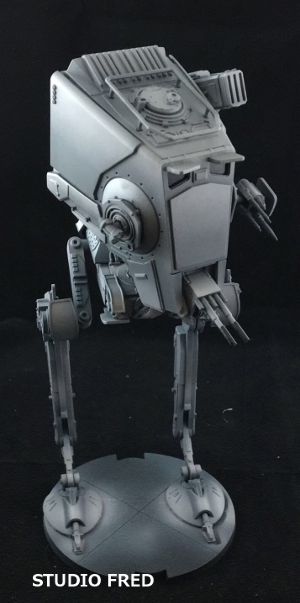
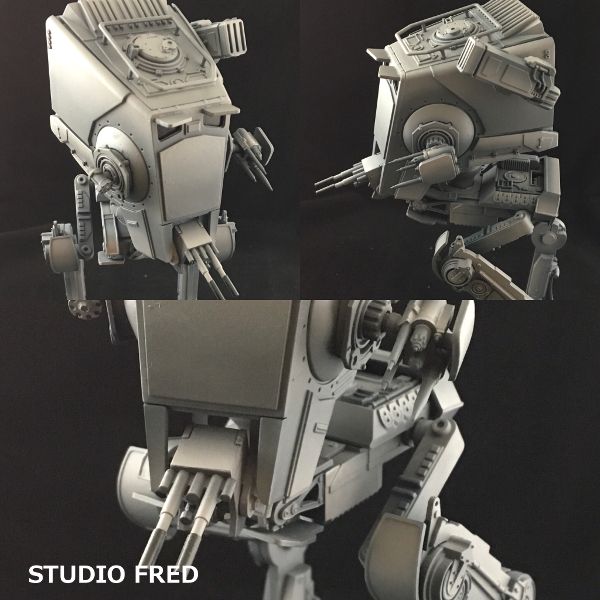
| Additional weapons are magnetised. |
 |
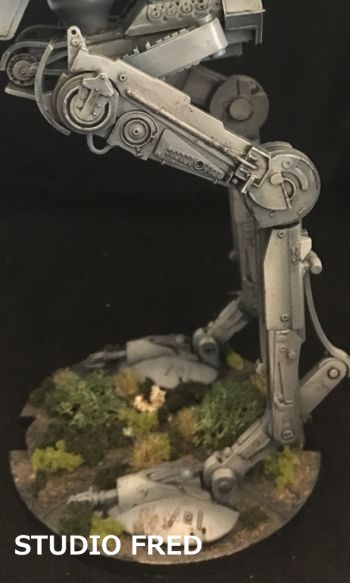
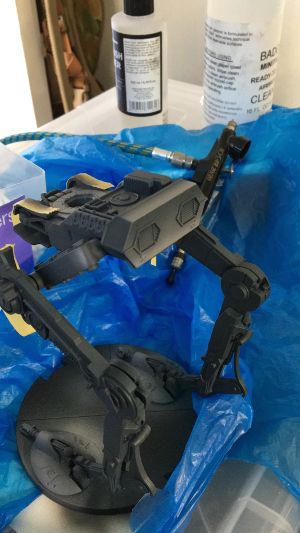
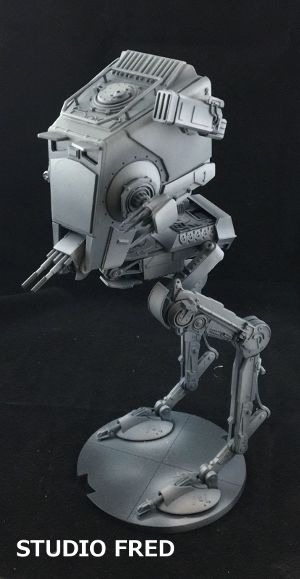
| Chicken walking |
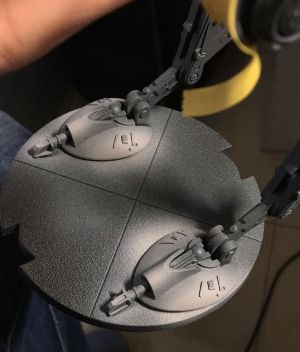
Detailing the base was also good fun- trying out different combinations of foliage.
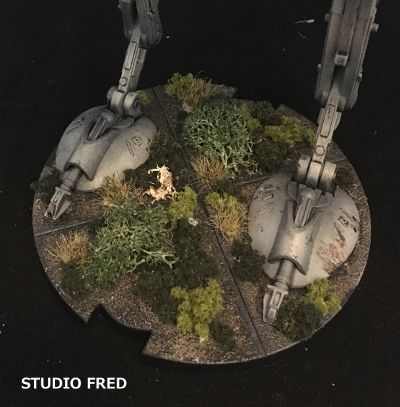 |
| Lichen, tufts and "underbrush" of different colours. |
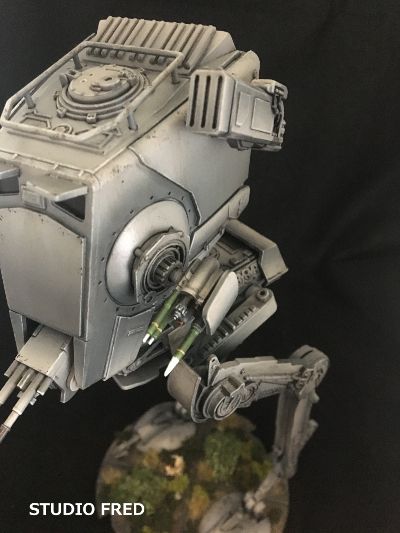 |
| Rockets and missiles. |
I can't stress enough how important the weathering is to making this model look good.
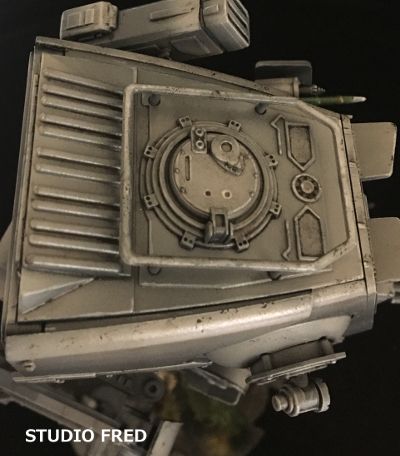 |
| Weathering hatches. |
 |
| Oil washes and sponge on acrylics. |
 |
| Blast 'em! |
Assembly
 |
| This is why you dry fit. |
I mucked around with a few poses - seeing what looked the best. I soon realised I had assembled the main blaster turret upside down and had to fix it.
I bought this since I have very little understanding of paints and I hate having to mix paints. Much better to get all the things I need from a single bottle!
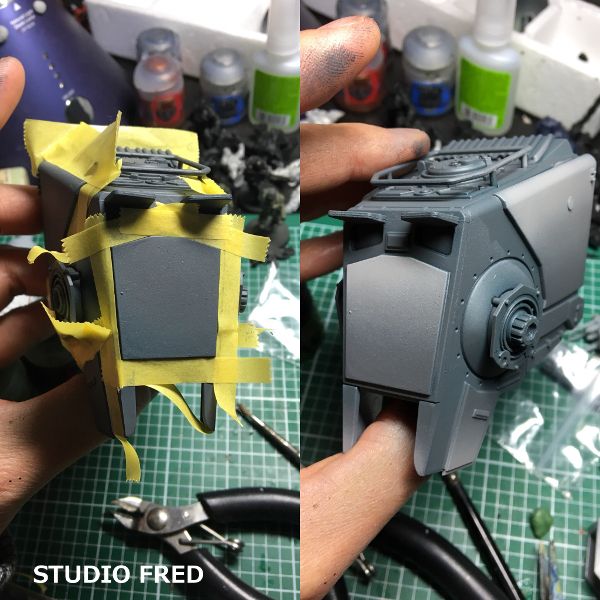
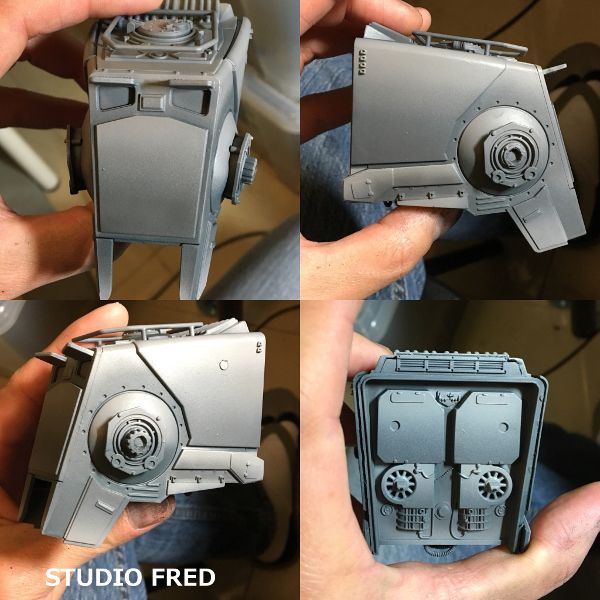
The model fits together very well and there was minimal filing to get rid of the mould lines.
I used magnets on the sponson hard points and then chopped down the sponson "arms" to fit on another magnet. I made doubly sure that the two magnets would stick together (and not repel each other!)
 |
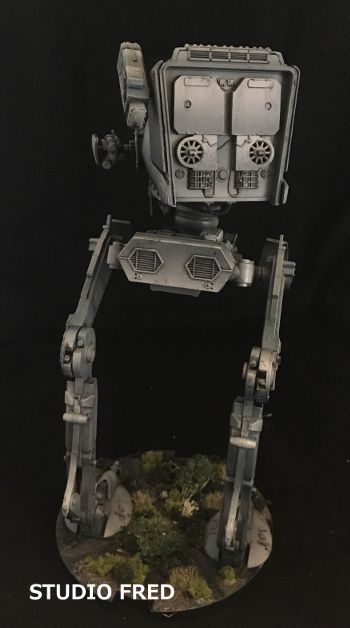
| Mortar attachment. |
I drilled a hole in the side of the cab and then widened it out with a round filing tool. Then it occurred to me that the magnet would just fall into the cab. So following a youtube tutorial, I cracked the back of the cab off (harder than it looks!) and then put in a wad of green stuff to "base" the magnet. With that done, I re-sealed the back of the cab.
Most tutorials say to just stick large magnet on the inside of the cab and the 'pull' will be strong enough to attract the mortar's magnet through the plastic.
Painting
 |
| For beginners with no clue... like me! |
Next, I did a bit of examining of this 'modulation' idea.
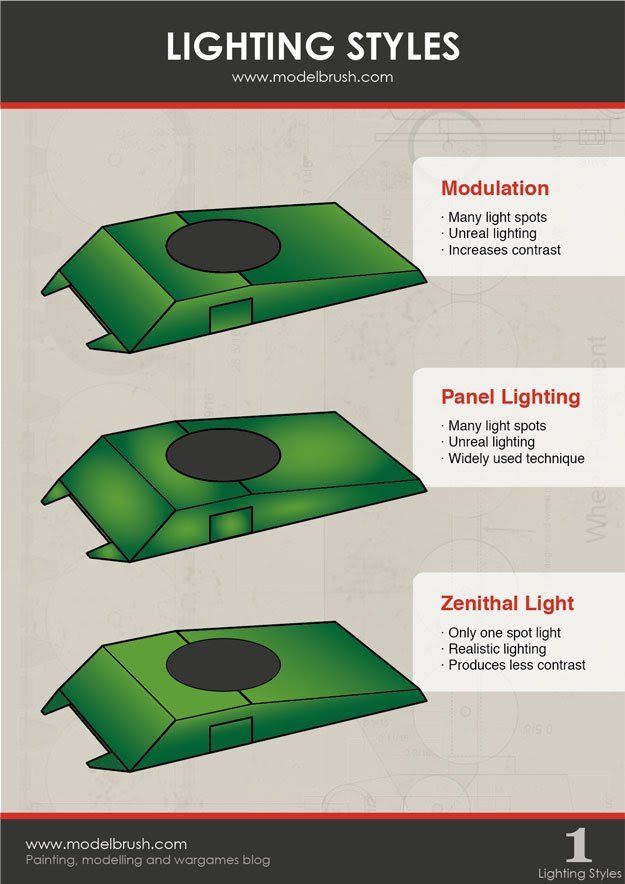 |
| Modulation is king. |
Modulation seems to quite common amongst military scale modellers. It makes for a very nice effect but is labour intensive requiring (seemingly) endless taping and retaping of panel after panel. That being said, for a display style piece, it is to me the gold standard.
Note that the highlight of one panel meets the dark part of the next panel. Also little panels on the same plane (side panels) tend to be modulated in the opposite direction to the main panel to help distinguish them from the main panel.
With the planning out of the way, I undercoated the model with Badger Stylrenz Black and then base coated with Dunkelgrau Dark Base.
(Because I used a Black undercoat, there wasn't much role for the Shadow paint bottle).
 |
| Modulation in action. |
Once the panel I wanted to do was taped off, I started to "highlight" up with the airbrush. I was very gentle at first- I didn't want to go full blast. I was aiming for a "one third" division of Dunkelgrau base, the next third being Dunkelgrau light base and then the final third being Dunkelgrau highlight.
 |
| More taping action. |
 |
| Cab done! |
With the cab done, I then got started on the legs.
The main idea to ensure the attachments stand out with their modulation lighting.

5. Rust streaks. Small points of brown paint were directly applied onto the model and then a brush with dipped with white spirit dragged the paint blot down the cab (going from highest point to lowest point). If it was too dark, I cleaned the brush off, soaked it in white spirit and dragged it over the streak again- thinning it out even more.

 |
| The modulation train in full flight. |
I modulated almost every flat surface I could get to. The back panel has been done here and the knee and hip guards as well.
The legs were decidedly tricky being so slender so I did my best and then moved on. Weathering would take care of the look of the legs.
 |
| Hmmm.... |
Without a clear panel with sharp angles, I used zenithal highlights on the feet.
 |
| Checking the overall look. |
Once satisfied I hadn't forgotten a panel (God forbid!), I then did the weapons.
 |
| Weapon check 1. |
 |
| Weapon check 2 |
 |
| Modulation inspection. |
Now happy with the modulation... the ultra tedious detailing process began.
It involved endless edge highlighting with Dunkelgrau shine (which I found quite annoying to apply with a brush as it was so thin).
I did get a bit fed up with the legs and ended up skipping most of the legs- reasoning that heavy weathering would end up hiding the highlight anyway.
I did have fun with the rockets as they were the only part of the model I could put some colour on. I painted two red 'gem' targeting lasers and did the rockets in military green with white warheads in a homage to the CRV7 flechette rockets. I could imagine the Empire using something similar to clear out Rebel infantry hiding out in forests.
Weathering
I only have a rudimentary understanding so I'll explain the process as best I can.
1. Gloss Varnish. I first used Testor's Gloss varnish (Clearcote) on the model. I applied two separate coats. This is to allow the oil washes to run freely and not bond with the acrylic paint underneath.
2. Oils onto cardboard. A small dollop of Windsor and Newton Black and W&N dark brown are squeezed onto cardboard. The cardboard helps soak up the linseed oil.
3. Three wells of White Spirit. Then I poured out a small amount of Windsor and Newton White Spirit into 3 wells of an artists palette. A dedicated "oil" brush with synthetic fibres was then used to scoop up some black paint and mixed into the first well. This will be the "thick" wash. Then a smaller amount was mixed into the second well- this was used as a thin wash. The final well was left alone as it was used as cleaning up wash "overspill" with a cotton bud dipped in this well.
4. Pin (pin point) Wash applied. The black wash ran into the crevices almost by what seemed like capillary action. It flowed extremely well and and overspill was cleaned up very quickly by a clean brush/ cotton bud dipped in the clean White Spirit. It was a very easy process.
|
| Streaking on the back of the cab. |
5. Rust streaks. Small points of brown paint were directly applied onto the model and then a brush with dipped with white spirit dragged the paint blot down the cab (going from highest point to lowest point). If it was too dark, I cleaned the brush off, soaked it in white spirit and dragged it over the streak again- thinning it out even more.
6. Dry for 24hrs.
7. Once that was all done, I mixed some black and brown paint (acrylic) and then grabbed a sponge. Dabbing the sponge into the mixture, I then dabbed the sponge onto some paper until only a faint amount of paint was left. I then carefully dabbed the sponge on the points of the model that had the greatest points of wear and tear.
If you want to see a real master at it, try checking out this link: Missing-Lynx who does an in depth discussion of modulation (using oils to accentuate the airbrushed modulation) and weathering.
Summary
I found the process challenging and ultimately very enjoyable.
After a few more Infinity figures, I'll experiment on another big vehicle!
Until next time, happy hobbying.
Thanks! It's always nice to try out something new.
ReplyDelete